How to Jailbreak iOS 4.3 GM on iPhone 4 with PwnageTool Custom Bundle
You can Jailbreak iOS 4.3 GM on iPhone 4 with PwnageTool custom bundle, Thanks to FSM. This iOS 4.3 jailbreak is tethered for now and currently supports iPhone 4 only. Follow the instructions below to jailbreak iPhone 4 on iOS 4.3 using PwnageTool 4.2 + Custom Bundle + RamDisk Fixer.

The jailbreak works fine for iOS 4.3 GM on iPhone 4. Still, this is not for everybody. If you are not a developer or not brave enough to tinker with your iPhone 4, just wait for an official release from the iPhone Dev-Team.
Note
- PwnageTool custom bundle will preserve your current iPhone baseband
- Cydia is fully working on iOS 4.3 GM after jailbreak
- It’s a tethered jailbreak
How to Jailbreak iOS 4.3 GM on iPhone 4 with PwnageTool Custom Bundle
Download
- iOS 4.3 GM (Please don’t ask for the link, try Google or get an Apple developers account)
- PwnageTool 4.2
- Custom Bundle for iPhone 4
- RamDisk Fixer
Install Ramdisk Fixer
Download Ramdisk from the link above and install it. It will hook PwnageTool.Put the Bundle into PwnageTool
- Download PwnageTool from the link above and extract it to get PwnageTool.app
- Download the custom bundle for iPhone from the link above and extract it to get iPhone3,1_4.3_8F190.bundle
- Right click on PwnageTool.app and Show Package Contents.
- Navigate to Contents>Resources>Firmware Bundles> and copy the iOS 4.3 bundle (iPhone3,1_4.3_8F190.bundle) here.
- Now close the window.
Create Custom Firmware With Modified PwnageTool
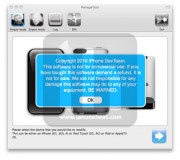
1. Open the PwnageTool.app that you just modified.2. Hit the OK button.
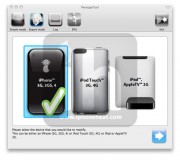
3. Now select Expert Mode from the top left side of the window.
4. and then select your iDevice. Hit the Next button.

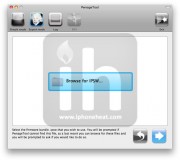
5. Now hit the Browse for IPSW button and select iOS 4.3 GM firmware for your device (downloaded from Step 1).
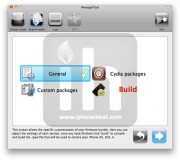
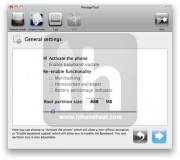
6. On next screen, Select General and hit the Next arrow button.
**Select Activate the phone option if you’re on unofficial carrier.
**Do NOT select Activate the phone option if you’re on official carrier e.g. AT&T.
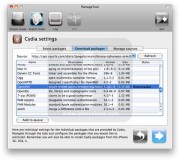
7. The Cydia settings menu allows you to create custom packages so you do not have to manually install the necessary them later.
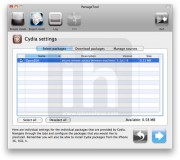
Click to select the Download packages tab. Then click the Refresh button to display all the available packages. Double clicking the package you want will download it and make it available in the Select Packages tab. (Make SURE you install OpenSSH)
8. Checkmark the ones you want then click the blue arrow button.
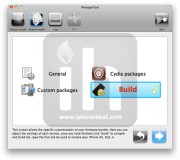
9. Keep hitting Next button until you’re back to the same screen where you selected General.
10. Now Select the Build Option and Hit Next.
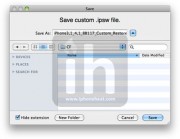
11. PwnageTool will prompt you to select a destination folder to save custom iOS 4.3 GM.
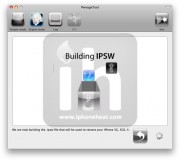
12. PwnageTool will start building your Custom IPSW.
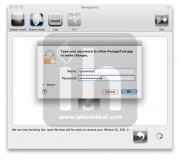
13. During the build process it’ll prompt you for your admin password.
Restore iPhone 4 with Custom iOS 4.3 GM Firmware
- Once you have the custom firmware, Open iTunes and Put your iPhone 4 into DFU mode. (How to enter DFU Mode)
- Once the iPhone/iPod Touch is in DFU mode, iTunes will also pop-up.
- Hold the alt/option key and click on restore button.
- Browse for the custom firmware you just built with PwnageTool, select it, and wait for your iPhone 4 to be restored


Boot iPhone 4 in Tethered Mode
- Download and install MacPorts
- Open Terminal and input
sudo port install libusb - Create a folder named Tethereboot on desktop. Download the Thetherboot utility and put it Tethereboot folder.
- Duplicate your custom firmware (Custom iOS 4.3 GM) and change the extension of duplicated firmware from .ipsw to .zip and unzip it.
- Copy the following two files from the extracted custom firmware:
- iBSS.n90ap.RELEASE.dfu
- kernelcache.release.n90
- Put your iPhone 4 into DFU mode (How to) and then Open Terminal and type:
cd /User/Desktop/Tetherboot/
./tetheredboot iBSS.n90ap.RELEASE.dfu kernelcache.release.n90


 09:37
09:37
 Jordan van Zyl

 Posted in:


0 comments:
Post a Comment